


 2017 - 2024 Tab Media
 babe •
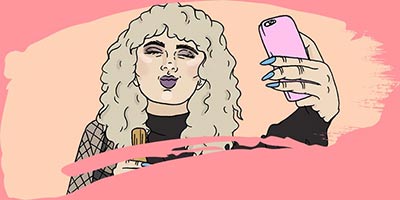
A guide to Facetuning your photos like an Instagram influencer
From boiled egg to snatched in minutes
by Nian Hu
Let's cut the crap. We all Facetune, alright? He does it, she does it, your best friend's mom does it. There's no shame in talking about it openly! Everyone retouches their photos, and that's just the goddamn truth.
We look different in real life than we do in photos. No camera is perfect, and even though most of them are pretty damn good, they still do things like make your nose look bigger or your legs look thicker than they actually are. And small things like lighting and angles can make a huge difference in the way you look.
Facetune is not the antithesis to body positivity everyone makes it out to be. Like makeup or plastic surgery, it's just another way to feel better about yourself in a world full of oppressive beauty standards. So, now that our collective guilt has been assuaged, let's hear from the Facetune expert herself (me) on how to look snatched in your photos and make your enemies tremble:
Smooth your face but LIGHTLY
The key word (in case you couldn't tell) is LIGHTLY. Swipe your face with the Smooth tool as lightly and gently as possible. Okay, think about it like this. Imagine you're stroking a very fragile, very delicate ladybug. You don't want to crush her!! Unless you're a psychopath or something. And always, ALWAYS remember that less is more. Try to focus your swipes only on the parts of your face that need it the most — the massive breakout on your chin, or the crinkles around your eyes. One swipe too many and you'll wind up looking like Kimberly Guilfoyle. Shudder.
Accentuate your features with the Details tool
The Details tool is awesome because it instantly draws attention to whatever you're brushing it over. Swipe it over your eyes and lips to make them pop (especially if you're not wearing makeup already). I also like to use it on whatever jewelry I'm wearing to make it look extra sparkly. But be warned, with great power comes great responsibility, and this tool is extremely powerful. So powerful it'll make every pore, wrinkle, and defect of your skin noticeable if you overdo it. So again, swipe lightly! And use the erase function to wipe away any excess.
Put makeup on yourself with the Tones tool
This is probably one of my favorite tools because of how versatile it is. Use the Picker function to grab a color that already exists in your photo, and then use the Tones function to paint with that color. SO fun!!! The only problem, of course, is it can look pretty fucking weird if you overdo it. Like, imagine a random patch of bright blue on your face? It's easy to fuck up with this tool, but if harnessed correctly, it can be your most powerful ally. I like to use this tool to put virtual makeup on my face — super handy if I'm not actually wearing any that day! I've used this tool to create a goddamn cat-eye and no one has noticed. In the example above, I used the Picker function to select a brown-ish color from the edge of my face and swiped it down my cheekbone. Voila! Instant contouring!
Reshape your body with TINY swipes — and always, always swipe in the direction of your surroundings!!
Alright, ladies. This is the part you've all been waiting for, presumably. In fact, some would say that this is the ONLY purpose of the entire app. With the Reshape tool, you can become the skinty and/or thicc queen you've always wanted to be. Yaaaay! But wait. It's not exactly that simple. One false move and you'll be THAT girl who posted a photo where the kitchen counter is literally curved around her disproportionately enormous ass.
The key, therefore, is to adjust your body with short strokes. Remember that ladybug from earlier? Now imagine you're petting her. Bear in mind that she's very small, so your finger isn't moving a whole lot. After a few tiny swipes, you should stop. Sure, it might LOOK like nothing has changed. But if you press the comparison button at the bottom right, then you'll see what a HUGE difference you've made already. Stop immediately! Remember, you want to make yourself look like a slightly better version of yourself — not a completely different person.
Another key is to swipe in the direction of your surroundings, ESPECIALLY if you're standing near any straight lines. Take the example above. While I was reducing the thickness of my thighs, I had to take into account the fact that I'm sitting on a (relatively straight) metal rail. One small inward tuck into my thigh and suddenly the rail I'm sitting on starts to bend wildly. NOT a great look. Instead, swipe along the rail itself. That way, the rail doesn't change its shape AND your thigh looks skintier. Win-win!
Oh, another important thing? NEVER USE THE RESHAPE FUNCTION. Always, always use the Refine function!!!
Get rid of anything you don't want with the Patch tool
Ahh, how I LOVE the Patch tool! I can't even tell you how many times it's saved my life. You know when you get the perfect shot, but there just happens to be a massive crowd of tourists hanging out behind you?? Ugh. What's a girl supposed to do? Fortunately, there's an easy way to fix this. Use the Patch tool to grab one part of your photo and move it over to another part. Think about it like copy + paste — except, you know, with small circle-sized chunks of your photo. You can use this to get rid of any random people who are photobombing your perfect photo, as well as anything else you don't want in your pic. For example, I used it to successfully remove a hair tie from my wrist. Why? Honestly, just to prove that I can.
Brighten up your surroundings with the Whiten tool
So your body is looking amazing but your background is a little…meh. Especially if you're indoors, you know what I'm talking about. That uneven yellow lighting just isn't super flattering! And every other Insta thot has those beautiful white backdrops that look straight out of a magazine shoot — how do they DO it?! The secret, my friends, is the Whiten tool. Ostensibly designed to make your teeth look whiter, this tool is actually most effective when used on white or semi-white backgrounds. Brush it over that white marble countertop or white fur rug to transform it into a crisp shade of white that will leave your friends SHAKING with delight.
Okay, you're welcome! Edit away, but remember to tread lightly.